Dairy-Free Caramel Sauce tastes just like a traditional homemade caramel sauce. The flavor is way better than anything you can buy in a bottle and it's much more cost-effective. It keeps for weeks in the fridge and goes well with so many sweets!

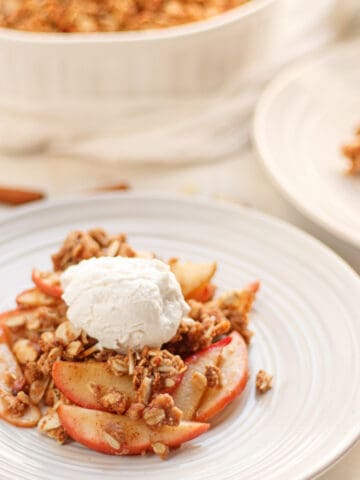
Dairy-free caramel is also perfect for dipping with apple slices, drizzling over apple pie, or even coffee beverages like this Dairy-Free Cold Foam.
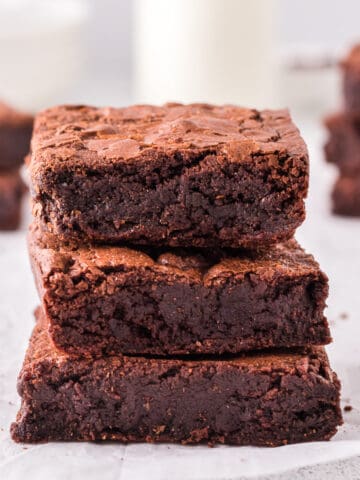
My favorite way to enjoy caramel is with ice cream or brownies. Or even all of it together. I don't have a vanilla ice cream recipe on the blog yet, but my favorite brand of dairy-free ice cream is SoDelicious. They make a couple of different kinds of vanilla ice cream. Take a scoop of that, pair it with my fudgy Dairy-Free Brownies, drizzle this caramel sauce on top, and thank me later.
Jump to:

📝Ingredient Notes
- Cane sugar: Cane sugar caramelizes better than brown sugar, so I recommend using it over brown sugar.
- Non-dairy butter: I always recommend using a brand you like the taste of, because not all brands of vegan butter taste the same. I always use Country Crock Butter with Olive Oil (or with Avocado Oil).
- Unsweetened canned coconut milk: I use the canned version because of the higher fat content. In this recipe, I don't use the solid cream at the top of the can, but rather the liquid underneath.
- Cornstarch: This ingredient is important because it helps thicken the sauce once it cools.
- Salt: It balances the sweet flavor of the caramelized sugar.
- Vanilla: Vanilla is a flavor enhancer. It brings the warm, sweet flavors together nicely.
🥣Equipment
- Stainless steel pot
- Wooden spoon
- Fork
🔪How to Make Dairy-Free Caramel Sauce

- Get all of your ingredients prepared and ready to go. In a medium-sized pot (preferably stainless steel) on the stove, add 1 cup of granulated cane sugar. Set the heat to about medium-high. Just keep in mind that you don't want it to get too hot, or the sugar will burn.

2. Without stirring, allow the sugar to slowly melt as you gently swirl it in the pan. Do this continuously as it melts, and do not mix with a spoon. This will take around 10 minutes so be patient! It will clump together and crystalize before melting into a smooth sugary syrup. Once most of it starts to melt, turn down the heat to about medium-low. The final color should be amber, and it should be thick, yet runny.

3. Take the caramelized sugar syrup off the heat. Be sure to have the remaining ingredients and a wooden spoon ready to go. With a fork, mix the hot coconut milk with the cornstarch until thick and smooth. Slowly pour it into the pot while continuously mixing with the wooden spoon.

4. Add the sliced butter and mix until combined. Then, mix in the salt and vanilla.
5. At this point, the caramel is not ready. It will look gel-like and not like caramel. Place it in a jar or airtight container, and let it cool down before putting a lid on and refrigerating it. Refrigerate for at least 5 to 6 hours. After this point, the flavors will come together and it will firm up into a classic caramel sauce. Enjoy!

🧊Storing
Store leftover caramel sauce in the refrigerator in an airtight container for up to 2 weeks.
✅Tips to Know Before Making Caramel Sauce
I've made many mistakes when making caramel sauce, and, apparently, so have many others on the internet. Read these tips before you begin so that your caramel sauce turns out flawless. And IF you do make a mistake, it may be fixable!
- Get all of your ingredients ready to go: Once you add the coconut milk and non-dairy butter, you'll need to work quickly. The caramelized sugar will start to thicken and come together so it's important to have everything ready to go.
- Use a light-colored pot: This way you can see when the color of the melted sugar looks amber. A stainless steel one is preferred because they are a great conductor of heat.
- Melt the sugar low and slow: But not too low, actually. You just don't want the heat to get too high, because you'll risk burning the sugar and can even ruin the consistency of the caramel sauce.
- Don't let it come to a boil: The melted sugar can burn really quickly so don't let it come to a boil. It will smell awful and taste horrible. The color of the melted sugar should be amber, not black.
- The sugar crystals will clump before they melt: This is totally normal. The hardened sugar crystals will melt into a sugary syrup after this stage.
- Don't stir until you add the coconut milk and non-dairy butter: Until then, you'll just want to swirl the sugar in the pan until it's melted. Too much stirring can cause the caramel to seize. Once you add the coconut milk and butter, you'll want to stir continuously with a wooden spoon.
- Your coconut milk and non-dairy butter have to be warm/room temperature: Cold or cool ingredients will change the temperature of the caramelized sugar and will cause it to seize (clump and harden together). Let the non-dairy butter come to a warm room temperature and heat the coconut milk in the microwave (or stovetop) before mixing it with cornstarch and adding it to the pot.
- Inconsistent heat causes the caramel to seize: If the melted sugar cools down before you add the coconut milk and cornstarch, it's going to set and harden. This will make it tough to mix. Prevent this by keeping the melted sugar hot enough, where it's still runny and mixable. If the caramel does harden, just heat it back up and patiently mix as it slowly dissolves.
⁉️Frequently Asked Questions
If the caramel seizes (clumps/hardens together), just put it back over the heat and let it slowly melt back into a liquid state. This takes a while so be patient and stir constantly with a wooden spoon. You likely won't get all of the hardened caramel to melt off the bottom of the pot, and that's okay. Just use what is able to melt back. To clean the pot, let it soak with water until the hardened sugar dissolves.
Yes! It doesn't take long at all to heat caramel sauce (like 10 seconds in the microwave). It will change the consistency, though.
🍦Ways to Enjoy Dairy-Free Caramel Sauce
⭐️Before you go! If you enjoyed this recipe for Dairy-Free Caramel Sauce, leave a recipe rating below! You can also take a picture and tag me on instagram. 📸
📖 Recipe

Dairy-Free Caramel Sauce
Equipment
- Stainless steel pot
- Wooden spoon
- Fork
Ingredients
- 1 cup granulated cane sugar
- ½ cup unsweetened canned coconut milk the liquid part, hot
- 1 tablespoon cornstarch to be mixed with the coconut milk
- ¼ cup non-dairy butter (4 tablespoons) sliced, room temperature
- ¼ teaspoon salt
- ½ teaspoon vanilla extract
Instructions
- Get all of your ingredients prepared and ready to go. In a medium-sized pot (preferably stainless steel) on the stove, add 1 cup of granulated cane sugar. Set the heat to about medium-high. Just keep in mind that you don't want it to get too hot, or the sugar will burn.
- Without stirring, allow the sugar to slowly melt as you gently swirl it in the pan. Do this continuously as it melts, and do not mix with a spoon. This will take around 10 minutes so be patient! It will clump together and crystalize before melting into a smooth sugary syrup. Once most of it starts to melt, turn down the heat to about medium-low. The final color should be amber, and it should be thick, yet runny.
- Take the caramelized sugar syrup off the heat. Be sure to have the remaining ingredients and a wooden spoon ready to go. With a fork, mix the hot coconut milk with the cornstarch until thick and smooth. Slowly pour it into the pot while continuously mixing with a wooden spoon.
- Add the sliced butter and mix until combined. Then, mix in the salt and vanilla.
- At this point, the caramel is not ready. It will look gel-like and not like caramel. Place it in a jar or airtight container, and let it cool down before putting a lid on and refrigerating it. Refrigerate for at least 5 to 6 hours. After this point, the flavors will come together and it will firm up into a classic caramel sauce. Enjoy!
Notes
- The coconut milk should be hot and the non-dairy butter should be a warm room temperature. If either of these are too cold, it will cause the caramel to harden and seize.
- To ensure you don't get any clumps in your final sauce, you can run it through a mesh strainer and press it with a spatula. You'll do this before refrigerating.
- This homemade caramel sauce will last up to two weeks in the refrigerator.
- The caramel will thicken in the refrigerator. If it's too thick, let it come to room temperature on the counter.
Nutrition
Nutrition Disclaimer: The nutrition label is only an estimate. Amounts may vary based on the products used and different nutrition calculators. If tracking nutrition information is important to you, it's recommended that you plug these ingredients into an online nutritional calculator.


Magi Kyle says
Is there any other sugar substitutes you can use. I can’t eat cane sugar
Kayla says
I haven't tested this recipe with sugar substitutes, so I can't say for sure. Can you have coconut sugar? I know there are many recipes on the internet that make dairy-free/vegan caramel with that. I believe the coconut sugar is melted down with canned coconut milk (and maybe cornstarch), and salt. Then it's simmered until thick. Again, I haven't tried this, but I have seen it online. I hope this is helpful. I'd love to hear what you try!