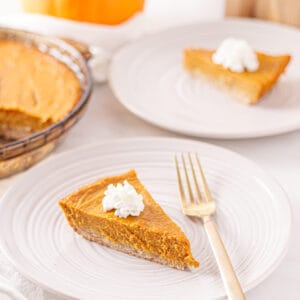
Dairy and Gluten-Free Pumpkin Pie
This Dairy and Gluten-Free Pumpkin Pie is the best pumpkin pie that's ever existed. The filling is light and delicious in flavor, but the crust is what takes this pie to a whole new level. Serve alone or with a delicious scoop of dairy-free whipped cream.
Ingredients
Pumpkin Pie Filling
- 15 ounce can of 100% pumpkin puree not pumpkin pie filling
- ½ cup coconut cream from a can of coconut milk see notes
- ½ cup honey or pure maple syrup I use honey
- 2 eggs room temperature
- 1 egg yolk room temperature
- 1 teaspoon vanilla extract
- 1 teaspoon ground cinnamon
- 1 ½ teaspoon pumpkin pie spice
- ½ teaspoon coarse kosher salt
Crust
- ½ cup chopped pecans
- ½ cup unsweetened shredded coconut
- ½ cup rolled oats
- ½ cup oat flour see notes
- ¼ cup pure maple syrup or honey I use maple syrup
- 3 tablespoons coconut oil melted
- ¼ teaspoon coarse kosher salt
Instructions
- Preheat the oven to 350 degrees Fahrenheit.
Prepare the Crust
- In a food processor, combine all of the ingredients for the crust. Process until all ingredients are well combined and sticks together when you pinch the mixture in your fingers.
- Spray a pie pan with oil to ensure that the crust doesn't stick.
- Press the mixture in the bottom of the pan firmly. Its just going to cover the bottom of the pan. The crust will not come up on the sides of the pan. I like to use a spatula at the end to smooth out the crust.
- Bake in the oven for 10 minutes and then let cool while you prepare the filling. Do not turn the oven off.
Prepare the Pumpkin Pie Filling
- In a large mixing bowl, combine all ingredients except for the eggs and mix well.
- Mix in the eggs and egg yolk last to ensure that they do not get overmixed.
- Once the mixture is well combined, pour it over the pie crust and smooth out the filling with a silicone spatula.
- Bake in the oven for about 40 minutes for a softer, uncracked pie filling. The pie should be set and have very slight movement in the center when shaking the pan. The center should not be batter-like, but set and sticky at the surface. If the pie begins to crack, that is a sign that the custard is getting over-baked. If this happens, no worries. The pie will still be delicious and you can cover the imperfections with whipped cream.
- If you like your pie to be a bit firmer and not quite as soft, you can bake for 45-50 minutes. It will get some cracks in the top, but it won't affect the taste.
- Remove from the oven, place on the counter and cover with a kitchen cloth, letting the pie come to room temperature. This can take anywhere from 2-3 hours.
- When the pie is room temperature, remove the kitchen cloth and cover with plastic wrap. Place the pie in the fridge and let chill for at least 8 hours.
- For storing, keep the pie well covered in the refrigerator.
- Slice, add your favorite non-dairy whipped cream and enjoy!
Notes
- For the can of coconut milk, you are ONLY using the coconut cream that sits at the top of the can. Do not add any liquids from the bottom of the can. Only the solid cream.
- For the eggs, I like to let them get to room temperature because when baking any type of custard-like dessert, it helps ensure that cracks do not form.
- You can also use whole wheat flour in place of the oat flour.
Nutrition
Serving: 1sliceCalories: 364kcalCarbohydrates: 41gProtein: 6gFat: 22gSaturated Fat: 14gPolyunsaturated Fat: 2gMonounsaturated Fat: 4gTrans Fat: 0.004gCholesterol: 65mgSodium: 244mgPotassium: 319mgFiber: 5gSugar: 26gVitamin A: 8365IUVitamin C: 3mgCalcium: 55mgIron: 2mg
Tried this recipe?Let us know how it was!